Thursday, February 26, 2015

Freak-Out-Free Pressure Canning Dry Beans

Freak-Out-Free Pressure Canning Dry Beans


Hummus, fresh from my own bottled Garbonzo beans. Can't beat that! Ready to to make your own? I'd love to help you because one of my favorite hobbies is pressure canning (and bottling) foods so dinner time is easy and yummy.


Since I can't always stand beside you when you pressure can, I'll share my trusty instructions and pretend I'm there, because if I could be, I would be. On a stool. Loving every minute of it! 

First, always read your specific pressure canner instructions and follow them. Your canner might be different than mine, so follow your canner's instructions, even though some things I'm sharing are for every type of canner.

Now, let's begin canning dry beans!

Step 1: Clean your stove top. "What?!?" you ask. Yep, clean it thoroughly because your canner will be hot for hours and invisible splatters will bake onto your stovetop. Believe me, it's no fun scrubbing it away when it's charred and black, so clean it off while it's still invisible.

I keep a supply list with my canner to make gathering supplies easy (It generally takes me about 15 minutes to clean and gather...)
Step 2: Gather supplies:
  • Canner, with lid, seals, inside rack, pressure regulator
  • Clean pint jars, lids, rings
  • Dry Beans - any variety, or several kinds
  • Salt (Canning or non-iodized)
  • Funnel, lid lifter, jar lifter, water pitcher
  • Timer
 
 Gasket to seal the lid. It will fit in nicely...
Step 3: Check the sealing rings if your canner has them. Some don't, but mine does. I place the big one in the slot in the lid. It's made slightly bigger but will squeeze in. The little one looks like a button in the center of the lid, and it's called the Automatic Air Vent. It's rubber with a metal plunger. When you purchase a new sealing ring the Automatic Air Vent comes in the same package. Replace them both at the same time.

 
 In the center of the lid you can see the little Automatic Air Vent. 
It looks like a little black button with a steel center. 
(Back, near the bread picture, you can see the steel Vent Pipe.)
Step 4: Look through the Vent Pipe. That's the little hollow tube about 1 1/2 inches long on the lid. If you can't see through it, clean it out with a toothpick.

1/2 cup dry beans per pint jar. I level all the beans except Garbonzo beans. I "round" them over the measuring cup. If not, my jars look a little skimpy rather than full, and who wants to feel cheated? Not me! Especially after sacrificing so much time canning them. (Other beans look full using 1/2 cup.)
Step 5: Fill each pint jars using 1/2 cup dry beans. (When using black, pinto, navy, great northern, small white beans, etc., I use a level 1/2 cup measurement. They are smaller beans with elongated shapes and have less water around them in the jar. When bottling Garbonzo beans I round over the 1/2 cup, but I don't heap or mound them.)

Using a funnel keeps beans from bouncing across the countertop and onto the floor. I pour the beans into a large bowl and scoop them up. It's easier than pouring from a bag or trying to scoop from a bag.


I pour salt into a bowl to easily measure it.
Step 6: Add 1/2 tsp. salt. Use canning salt or non-iodized salt.
 

With Garbonzo beans the salt filters to the bottom and is hard to see. If you're unsure if you've added salt to a jar look at the bottom. These jars were hot from the dishwasher and still wet inside so the salt sparkles. So pretty!

 Step 7: Add hot water, leaving 1-inch head-space.
 

1-inch headspace is up to the neck. The beans need room to expand, so don't fill it fuller. Use a magnetic lid lifter to pull lids from a pan of hot water where the seals have softened. Add rings and they're ready to go into the canner.
 
Step 8: Add warm lids and rings. I should have mentioned this earlier, and you probably already know this, but put a pan of hot water on the stove when you gather your equipment and place your lids in it. Keep them warm until you use them. But if you haven't done it already, don't fret. It only takes about 2 minutes to heat lids. They don't have to boil, in fact, it's better if they don't. Okay, on we go.... Screw the rings on "finger-tight." That's not so loose your toddler can remove it, or so loose a rocking jar in boiling water can work it off, but not so tight there won't be any air exchange during canning. If you're unsure what finger-tight means or feels like, put on a ring and take it off a few times to get the feel of it.


3 quarts of water doesn't seem like much, but that's all it takes. 
This isn't water-bath canning. The canning rack has holes in it and keeps the jars from sitting on the hot bottom.
Step 9: Place the canner on the stove, add 3 quarts of hot water, and turn to low. Place canning rack in the bottom.


You don't want jars toppling over in the canner. If you have a big space where bottles might tip over you can either fill it with a jar filled with water that you don't seal with an old lid and ring on it, or add a jar filled with a different variety of bean, or fill the gap with several old canning rings wedged in to hold the jars upright.
Step 10: Place a layer of pint jars in the bottom on the rack. If your canner has space for another layer of jars, stack them directly on top of the bottom layer. (If you're not sure about a second layer, place empty jars with lids and rings on them in the bottom, and a second layer of empty jars with lids and rings on top of them. If the lid closes you can stack jars. This is also a good way to find out how many jars your canner will hold before you ever use it.) If you only want to can 1 layer, that's fine too, but why not double the amount of jars?


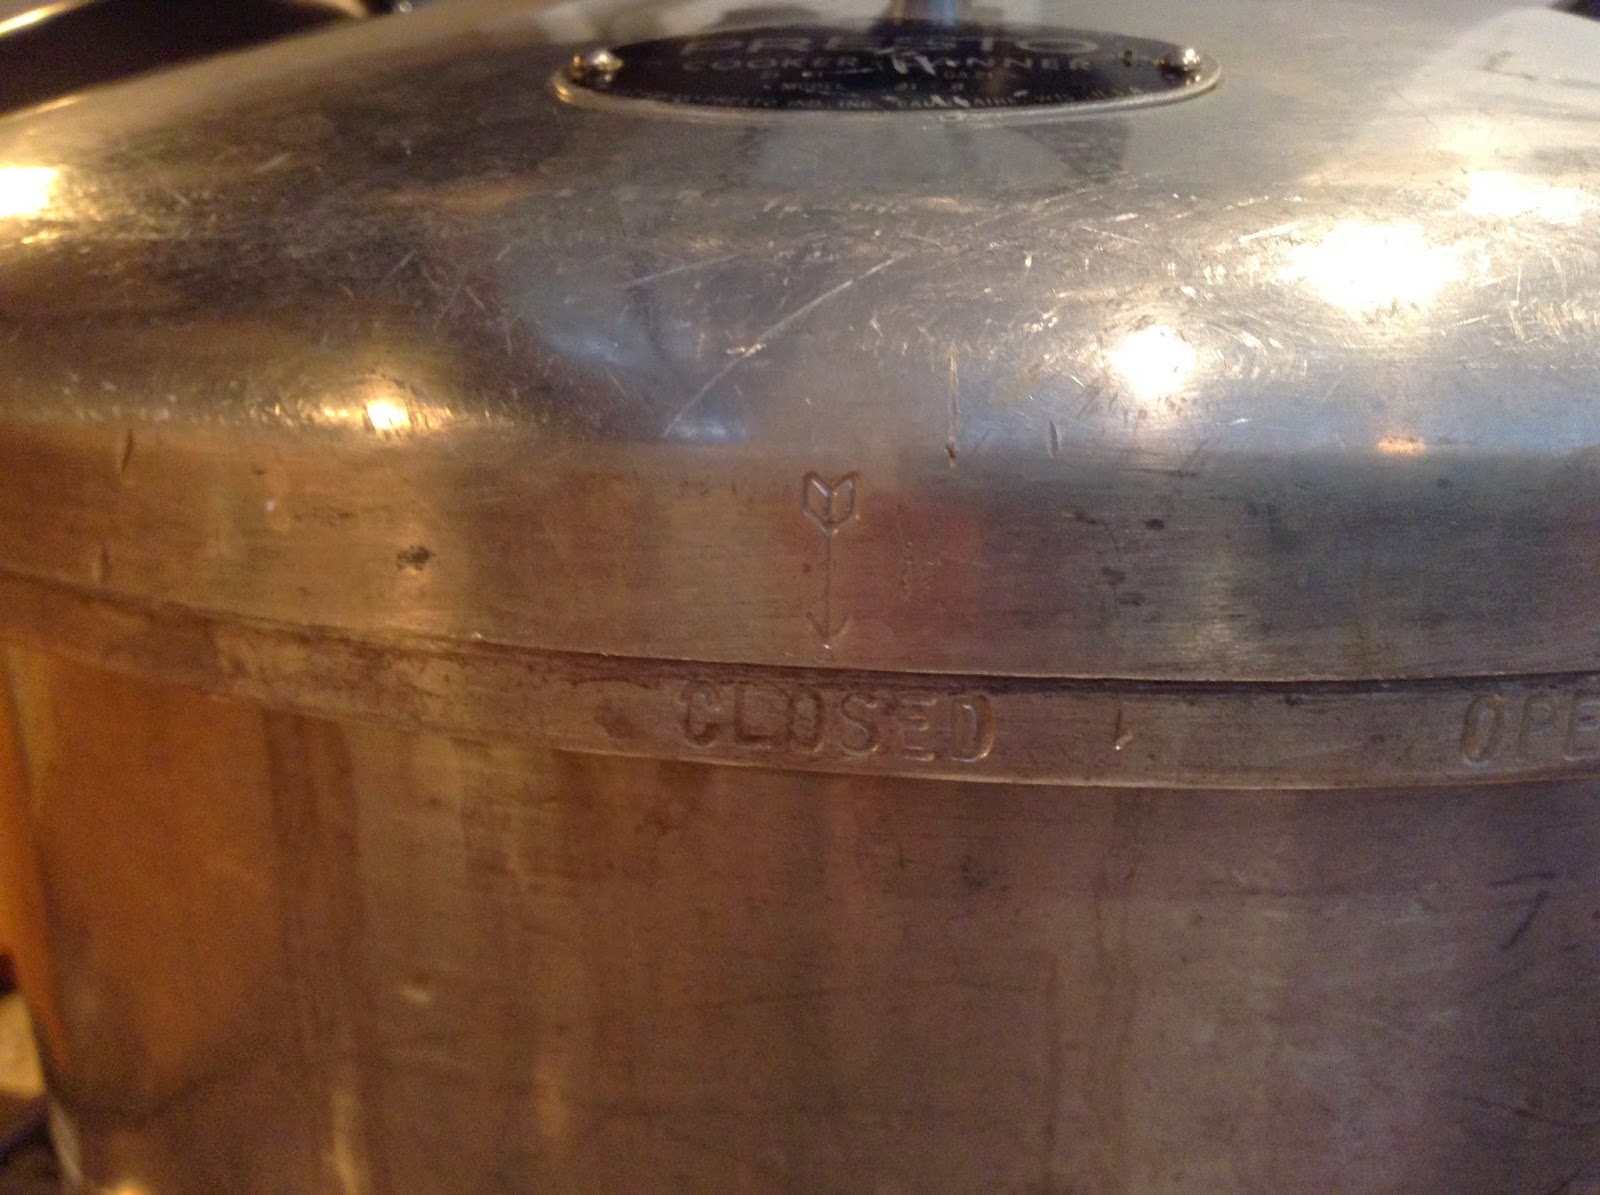
The arrow shows my canner is closed.
Step 11: Place the lid on the canner. Mine has an arrow pointing downward etched in the lid, and "Open" and "Closed" etched in the canner. My lid will only fit on correctly with the arrow pointing to "Open." Twist your lid until the arrow points to "Closed." When closed the handles on my lid line up in the center of the handles on the canner. (If you have an All American canner with wing nuts holding the lid on, read your instructions on closing and sealing your canner.)

Step 12: Bring up the heat inside the canner by turning your burner to medium. I set the timer for 10 minutes. This lets the beans and water heat up before I turn the burner to high.


I tried to take a better photo of the steady flow of steam from the Vent Pipe, but this was the best one. Look closely on the left side of the bread picture to see steam.
Step 13: Turn the burner to high after 10 minutes. Don't walk away from your canner at this point! You want a steady flow of steam escaping from the Vent Pipe. Once it's steady begin timing it for 7-10 minutes. (A steady flow is not a putt-putt of steam, and not a hissing-the-lid-off flow. It is just steady. You may need to turn the burner down a notch if the flow is too violent. Just keep it steady, not puff-puffing.) Getting to that steady flow may take 10 - 20 minute, so don't fret. But still, don't walk away, either. You've got to pay attention to the steam flow and the time.


The pressure regulator is covering the bread in the photo behind it. I placed it on the Vent Pipe after venting steam for 10 minutes. That is fun. Don't be afraid of it. Just walk over, set the Pressure Regulator on and then high-five yourself!
Step 14: Place the Pressure Regulator on the Vent Pipe. (I have a Presto canner and the Pressure Regulator is a little silver thing with a black top.) 


Notice the little Automatic Air Vent in the center of the lid. The little steel button has risen, sealing the lid. That always makes me smile.
Step 15: The steel button in the Automatic Air Vent should have risen and sealed the lid the last minute or two of venting steam, or when you put the Pressure Regulator on. If it hasn't risen, lightly  touch it with the edge of a spoon and it should pop up. (Air or steam shouldn't seep around the lid or the Automatic Air Vent.)

I turn my canner sideways because the space under the microwave is so tight. You can see the pressure is beginning to rise.
Step 16: Watch the pressure rise on your Pressure Gauge. I live at over 4000 feet elevation so I pressure can at 15 lbs. Check your elevation and the pounds you should use. The pounds of pressure you can at are determined by your elevation. (It generally takes my canner about 10 - 20 minutes to get up to 15 lbs. pressure.) The amount of time you pressure cook food is determined by the food, and always remains the same no matter the pounds of pressure. 


The pressure has reached 15 lbs. and I've begun timing this batch!
Step 17: Once your canner reaches the right pressure, start timing. Dry beans take 75 minutes, no matter what pounds you're canning at. Don't reduce the time, but be aware that if you wander off and come back 10 minutes later and your pressure has dropped below the correct pounds, then you need to get the pressure back up, and once you reach it again, start timing all over for a full 75 minutes. Fluctuating pressure and too low pressure is unsafe because of microorganisms. (Always check the amount of time to use when canning in quart jars. Usually if you're timing for 75 minutes for pint jars it will be 90 minutes for quarts, but check first. For beans I've heard the quality is better when using pint jars.)


Stay in the kitchen and keep your eye on the pressure. It's a great time to tidy up. I keep a box waiting for empty canning jars in my pantry. I emptied 2 just for this batch and have a few empties left over. I'll stack a 2nd box on top of this one when it's full. When 2 boxes are full I store them with my canning supplies and start filling another box. Pressure canning isn't like bottling fruit--I don't have to wait for something to come in season. I bottle all year long.
Step 18: Enjoy a chair near the stove because you'll need to stay nearby for the next 75 minutes. Once you reach pressure and start timing you'll turn down the heat in increments to hold the pressure at the correct pounds. Turning the burner down may take as long as 15-20 minutes before it holds steady for the remaining time, however, sometimes my stove has acted fussy and I've adjusted every few minutes the entire time. (Yes, bathroom stops are allowed, but make sure you hurry back.)


Actually, I took this freak-out photo on one of those days when the little Grands were pushing my buttons and I needed a psychological release. We snapped silly photos until things were back under control. I had no canning problems today, and don't expect them.
Step 19: Don't freak out. Water may condense beneath the Pressure Regulator and drip onto the lid where it splatters and hisses. That's normal, so don't freak out. The bottles inside are sitting in boiling water and will rock and rumble. That's not a problem, so don't freak out! (Remember, you packed your canner so they can't.) If the pressure goes up to 20 pounds or more you'll hear angry hissing and sputtering. Okay, now you have permission to freak out, but not until after you turn the burner down. Don't freak out, but turn it down! But, also stick around and watch as the pressure drops to where it should be. That means you can't hide out in the garage in your car biting your fingernails and waiting to dial 9-1-1. Once it gets back to the correct pounds, maintain it. Can you see why you can't walk away from the canner for more than a minute or two? I promise you don't want to freak out, so just relax and hang out with your canner like it's your best friend, because it is!  


After turning the burner off I walked into the garage and brushed the first coat of paint on this little wooden box. Now is a good time for me to advise you to not use rusty canning rings for canning. Mine used to go into the recycle bin, but I've found a new use: as spacers between my painting projects and the drop cloth. I keep a bunch of rusty rings in my craft box.
 Step 19: After 75 minutes turn off the heat and walk away. You are free! Your kitchen should be clean by now, all your emails read, you're caught up on Pinterest and FaceBook and paid the bills. The pressure needs to drop naturally, so don't rush it. (Trying to rush it might be why there are old stories of Grandma blowing up the house.) It takes my canner about 1 hour to reach zero pressure. If you're canning late at night, go to bed. You can open the canner in the morning.

Step 20: Remove the Pressure Regulator after the pounds are at zero and the little steel button in the Automatic Air Vent drops down. If the pressure is at zero and the steel button is up, wait a few minutes. If it hasn't dropped, lightly tap it with a spoon. If it drops, take off the Pressure Regulator. If it doesn't drop, wait a few more minutes and repeat. 

Step 21: Once the Automatic Air Vent button is down and the pressure regulator is off, wait 10 minutes for the canner to cool, then lift the lid so escaping steam won't burn you. Remove jars to a waiting towel on the countertop. (I double or triple the layers.)


How pretty! And worth every minute!
Step 22: Allow jars to cool 24 hours (or overnight) before washing them. Remove the rings and wash them separately, allow them to dry and store them separaately. Don't put the rings back on the jars.


All of these jars sealed!
You'll hear the jar lids pinging as the pressure in the jars change. The lid will go from convex to concave in the center. Always check the seal by pressing in the center of the jar before opening it. If it's bulging outward the seal is broken. Throw out the food. If you press the center and it goes in and springs out again, the seal is broken. Don't eat unsealed food! If you press the center and it's in and stays in, yay! your jar is sealed. Open it and enjoy!
Step 23: Label jar lids. I use a sharpie and put the product and date. (Garbonzo beans; 2/26/15) Don't ever expect yourself to remember when you bottled something, and believe it or not, some things look similar in jars. Save yourself from surprises and guessing.

Step 24: Store the jars where you can easily pull one out to use. The key word is use. Like I did today. I made hummus while a new batch of jars sat in their hot pressure bath and it snowed outside. So yummy!


Quick note about Garbonzo beans: They come out of the canner basking in a clear golden liquid. After cooling and sitting the liquid begins to solidify and thicken. Don't fret. I drained the liquid from one jar, and partially from a second jar when I made hummus today. I saved the liquid in case I needed some for thinning, but it was perfect without adding any more. 

Enjoy!

*I check beans for rocks, dirt clods or yucky looking beans before I place them in a jar. I don't rinse them.

*I've bottled several different kinds of beans in one batch: black beans, garbonzo, pinto and kidney beans.

*I don't precook my beans. I've never had a jar not seal or one explode or had any problems with them. Beans expand--just look at the before and after pictures. Make sure you have 1-inch head space in the jar and water. Please, no more than 1/2 cup per pint (except Garbonzo) Yes, that 1/2 cup is exact or slightly less on other varieties.

*I've been told bottled beans without salt are yucky. I don't want yucky beans so I always use salt.

*I've been told iodized salt makes liquids in bottled foods look cloudy, and sometimes it looks unappetizing. That can lead to tossing out the food thinking it has spoiled when it hasn't. If  you use iodized salt please be aware of that and don't throw your investment away.

*I've heard there are anti-caking agents added to salt, both iodized and non-iodized, and those may also cause clouding. True canning salt supposedly doesn't have anti-caking agents, but I can't find it in stores anymore and haven't found any online.

*Iodine is important in the diet, but I don't worry about it with my canned foods because our family uses iodized table salt and I'm fairly certain we aren't lacking.

*I have no idea if french fries, chips and processed foods contain iodized salt. I doubt it. Why would they want a creepy looking cloud or color? 

*If a jar is cloudy looking check the seal first. You should already know what type of salt you've used, so also be aware of that. If seal has been compromised the cloudiness could kill you if consumed. (Think botulism.) Throw it away in the jar--don't open it and sniff--and wash your hands in hot water with soap. (Don't google how to wash your hands and spread the microbes.)


*I definitely don't know it all or have all the answers, but I've read a ton of material about canning and how to do it safely, may know the answer, so if you have a question, please ask. There are also professional experts you can ask.

*Some of the basics of preserving food include temperature, pressure, acid, sugar, salt and lack of oxygen. It's good to know which foods can be successfully and safely canned by which methods.

*Don't freak out. Get the facts, do it correctly, and enjoy your investment.

Tuesday, February 24, 2015

#7 What I Believe - Life is Unpredictable & Unbelievable

What I Believe - Life is Unpredictable & Unbelievable

I can't believe I'm writing this post, and that I'm actually going to post it live. I'm astounded sometimes what happens in life--when daily living uproots me, spins me around, and launches me into the future.

My last post, less than 2 weeks old is about home and what I believe and feel about home. I stated: 

"This home is not my final destination." 

Let me say this fast and get it over with before I choke on it and slip into denial: We're moving. Again. As in selling our home and moving out. 

As in--
  • Scrounging for apple boxes for packing
  • Filling and stacking boxes
  • Staging every inch of this little nest
  • Calling our super cool realtor with good news: "Time to get back to work!"
  • Lifting and carrying boxes x 1,000,000
  • Moving furniture (Yikes! Please be careful!)
  • Qualifying for loans (Ick...)
  • Touring homes (Just as icky...)
  • Walking away from potential great homes, and running from terrible ones
  • Offering to buy homes with a fat earnest money checks and smile
  • Negotiating. Negotiating some more. And even more...
  • Signing papers until I forget how to spell my name
  • Ordering home inspections
  • Sealing the final deals and feeling sick to  my stomach
  • Looking at new keys in our hands
  • Opening new front doors
  • Hopefully placing a "For Rent" at one new abode
  • Stashing boxes in every conceivable corner of the other
  • Tripping over boxes and stubbing toes for many days
  • Exhaustion
  • Relief
  • Tears. Lots  of them. Self-talking: "This is good. I'm okay. We're okay. Everything's on track."
  • Finally being home. (Oh, really?)
I am so overjoyed at this whole development that I'm pacing around in a nervous state of confusion, sadness and excitement--and holding back tears. It feels like I've guzzled a whole 2-liter bottle of Dr. Pepper in 5 minutes and now I've been told to calm down and write a check list and get started? Uh, no. Not going to happen until I calm down.

I'm pacing my Happy Little Home like a cornered pack rat trying to escape deportation and reformation. I've peeked in every closet, cupboard and drawer in the past 72 hours and silently shoved doors shut and leaned against them and sighed in disbelief. You see, in the past 7 months I've put stuff here and there as I've settled in forever. You know--ditched things from sight until I could determine their final resting place. I've enjoyed this home. Loved it, really. I don't feel like I've finished living here. (That's actually good because I'll be here for a few more months or longer...)

Behind some doors I found utter and complete chaos, although nicely stacked. That hasn't bothered me until now because I'm the queen of order and it was delightful and invigorating knowing there were still creative outlets awaiting me. I envisioned zero boredom problems on my horizon for a very long time. But now? Now I've got to define and refine space--and fast--rather than perfect.

I see work. The nitty-gritty kind done fast and furiously which usually equates to non-permanent, not satisfying and completely forgettable. Forgettable means losing track of items and having no ideas where to search for them. Losing track morphs into frustration and possibly buying a new whatever. New whatevers bug me. On the up side, I might find my lost little crock pot. 

So, here comes a brief home tour I'm going to cry over...
 
This is my current and very temporary kitchen. More than any other area in my home I planned it to  perfection. How do I give up something like that? I'll miss the wall oven most, and the raised bar and "butterfly" style island that invited me to watch TV while I fussed over dinner. (Oh, skip the fussing part. I just fixed...)
Meet the dining room area. It's tiny and tight, but just right. French doors open onto great views, a sunny deck, and a private little back yard where iris planted last fall are finally waking up to greet spring.
My favorite cat naps in a basket nestled between the dining area and living room. Sometimes he snuggles with kid's toys. There's nothing like a cat to transform a house into a home, and this is the best kind.
Welcome to our living room. Big windows frame an old farm, clydesdale horses, Mt. Timpanogos, changing weather, spectacular sunrises and sunsets, and holiday fireworks. No artwork could ever be hung to rival that!
I just ordered decorative nails to trim out the little upholstered bench sitting across from the washer and dryer, but they haven't arrived yet. Nothing else seems to announce better how fast our plans have changed. Between packing boxes and stowing them I'll be finishing this bench. When we show the house it will already be tucked away in storage. (*sniffle*) With dried flowers tucked into an old window frame making the space pretty, I'll miss this area. I'll forever be looking for something similar.
Hello truck. Parking is a huge issue in our neighborhood. Maybe not for everyone else, but definitely for us. This is our baby. It has traveled the country with us, taken us sight seeing in British Columbia, moved one family member after another, and been a loaner for a day, a week, or for months. We've packed it with fun memories and now have it waiting for our next adventure. 

My husband is talking about another trailer. Not the kind restricted to only traveling North and South as snow falls or the sun pounds down. Not one with an on-board washer and dryer and satellite dish, but the kind that ventures into mountains and deserts and parks beside the ocean or a stream. Something hard to plant in one place for more than a week or two, and is eager to roam.

There you go. The retirement bug is biting hard. Very, very hard. This landing pad hasn't got enough glue to hold us here. 

Next house needs: Parking spaces. More parking spaces. Just parking spaces. Plenty of parking spaces. Extra parking, too.

And a nice kitchen, pretty please?


Friday, February 13, 2015

#6 What I Believe - I Believe in Home

What I Believe  - I Believe in Home

(View from our back window)

We're settling into our new home. Thanks for asking how it's going. Next week we'll celebrate seven months since we signed the final papers, transferred money and took possession of a newborn dream on a postage stamp plot. In many ways it feels like I've lived within these walls forever. At other times I enter and feel like I've never stepped inside before. Both sensations are a little odd, but explainable. Feeling at home partly comes because I'm surrounded by familiar objects, some that have traveled from one home to the next over several moves. Feeling like everything is unknown partly comes from my inner core that knows each day is new, and how I live has never been experienced before.

 (Foyer of my new home)

This home is not my final destination. I know that. I feel it deep within me in a place that contains a greater volume of knowledge and understanding than words can ever express. I also know it intellectually and can explain it in half a dozen concise sentences, so here goes:
  • Ultimately, we're all visitors here on earth. 
  • We aren't meant to live here forever.
  • Some people say we're here to be tested.
  • I say we're here on a work assignment.
  • The job responsibility is uniquely tailored to each of us.
  • Eventually we'll all be transferred to another home.
There you go. That sums it up for me. As for that "another home" part, we have a lot of hints, clues and perceptions of what it may be like, but the pictures our minds create isn't complete, and it's not meant to be, I've decided. Some people claim there isn't any other home--not one before this one, and none after this one, but I don't buy into that brief and accidental chance life-view. I believe in home. I believe in this one, a former one that had meaning and purpose even though I don't know much about it, and a I believe in a future home that will have meaning and purpose, although I don't know much about it either. That means the inner space--the now part of living in a home where I write blogs, wash dishes, plan vacations and toss and turn at night because I can't fall asleep--the earth existence part of home--also has meaning and purpose, even though I don't understand fully what that is, either.

I also believe that some of us, and probably all of us at some times in our lives, feel like the "work assignment" part that I call "this earth home" is a little vague on what we're here to do, exactly. Parts of it can make us say, "Huh? Can anyone clearly explain to me what I'm supposed to accomplish in this__________. (You fill in the blank. At times I've jotted in that blank: dark bog, or  mud pit, or dreary wasteland. I once heard it called a spook alley. But this middle home isn't always dark, unpleasant, unknown, difficult or frustrating, even though it has its share of those qualities, and some much worse.

This middle home also has spectacular mountains with amazing vistas to enjoy as we make our way to the summit, and we're constantly surrounded by incredible wonders to feast our eyes on, hear, or enhance our intellects and enliven our thoughts. When we're struggling against a current, rowing upstream, banging our head on a wall, or fighting our way through a densely tangled jungle, we have a tendency to forget we had to work hard to enjoy the wonderful things we experienced in the past, and the same is true for the present and future. We forget really living in this work environment requires effort, sacrifice, sweat and tears and we're often filled with discouragement, a view of our own inabilities and weaknesses, and we're accosted with repeated temptations to give up before we reach any place significant or accomplish something as meaningful as we truly desire. 

I've driven past homes under construction that have been abandoned and left to decay. You probably have too. We sometimes shake our heads and wonder: Did the owner run out of funds, energy, or enthusiasm? Did they die before the home was finished? Did they move out of state? Was the work so shoddy the building inspector shut the job down? I've wandered through homes abandoned over time as the railroad overshadowed the stage coach and river ferry and they were no longer needed. The physical structures that housed people with hopes and dreams slipped into decay. But the people--they continued on somewhere and in some way. They moved to new locations in this middle home, and eventually relocated to their future home. Relics of their past home are left behind like silent echoes.

When you walk through the front door of my current Happy Little Home #6 you'll immediately be greeted with two signs: 

Welcome
and
Find JOY in your journey

To me they aren't just cute little home decor items I snatched up when I discovered them in a cute boutique, but messages with sweet whispers that encourage me to never stop making my home environment as welcoming, loving and nourishing as possible. I'm here for an indefinite period of time, and these sayings offer encouragement to live for the present in this home as I prepare for my future home.

I'm sure you don't know this about me, but I hate (HATE!!!) phrases that tout: "Live for the moment!" or "Live in the present!" or "Be in the moment!" Not because I'm so wrapped up in the future that this exact moment becomes meaningless, but because...

Because I believe, very strongly believe, in planning, preparing and developing a future that make this exact moment very powerful. I believe in now, and I believe in tomorrow..
  • Tomorrow I'll use my credit card.
  • Tomorrow I'll eat breakfast, lunch and dinner.
  • Tomorrow I'll get dressed.
  • Tomorrow I'll drive my car.
  • Tomorrow I'll make another credit card, house and utility payment.
  • Tomorrow I'll celebrate something wonderful.
  • Tomorrow I'll read, laugh, sing, converse.
  • Tomorrow I'll be kind and serve someone.
  • Tomorrow I'll interact with people I love. And with strangers.
  • Tomorrow I'll need something; I'll want something.
So...
  • Today I'll consider my economical limits and possibilities and not undermine tomorrow.
  • Today I'll open my fridge and oven and use my salt shaker because I need to enjoy today and have strength for tomorrow.
  • Today I'll grocery shop, do laundry, and choose my lipstick shade because today matters and I'll need tomorrow what I've done today. (Yes, even the lipstick. It makes me smile today and will do the same tomorrow).
  • Today I'll fill my gas tank, run errands, buy stamps and buy a gift because tomorrow I may have a crisis or other things could stand in my way.
  • Today I'll be generous, loving, gracious and kind; I'll sacrifice and serve,  because I want to, and I feel that I need the hope and joy these give others and myself.
  • Today I'll be grateful, glad and joyful because no matter how rough moments of today get, this is not the end of the world, or life, or hope, or all that's good, and I want that assurance tomorrow.
  • Today I'll plan and prepare for tomorrow  because even though I close my eyes and go to sleep, there will be a tomorrow either here, or there.
I do all this because today isn't lived fully without tomorrow in sight and the past hanging around close by for reference on how to do something well, or not do it terribly.

What has all this talk about today and tomorrow got to do with my home? My personal physical Happy Little House?

My home is where I live today--the starting gate and landing pad separating one 24-hour segment from the next. My home consists of walls and ceilings, a garage and a backyard (with a farm and mountain view, currently). It's where I rest and rise, where I clean and organize, where I mend and repair such things as exhaustion and broken appliances. It's where I build stronger relationships. Where I design armor strong enough to protect me through tomorrow.

Home is sticks and stones, really. Mine has stucco and an asphalt shingle roof, and really, those details are terribly unimportant because home is much, much more than its design, surfaces, and furnishings. It is where life is lived, therefore it is an essential incubator, a feathered nest, a school room, a playground, a laboratory, a medical clinic, and a theater where life is rehearsed and acted out. My current home--our physical homes--is the sealant that binds past, present and future, making life 3-D and meaningful. 

For me, my home is a snugly blanket because that's the mood and meaning I've chosen for it. Wrapped up in that imagery, home can't get much more cozy, warm and pleasant than that! It also has the incredible ability to morph into many other things as needed--a safe haven, a bed-and-breakfast retreat, a rehab facility, and more. It's kind of magical at times, when it's not being its ordinary ordinariness where we watch TV and vacuum up crumbs. When I've marketed my homes they've transformed into spa retreats and dream destination vacation lands. Because I love all these home styles and elements and many more, I try to incorporate as much of them as possible for our daily living, while not losing sight of my supreme objective of maintaining a warm, snugly, inviting, security blanket feeling.

My past homes are reflected within my current home--the furnishings and my love of simplicity. There are also hints of my future home--my another home someday home. 

My home alludes to who I am currently, the possible terrains I've traversed in the past, and the probable ones I may explore in the future. Life is interwoven with the past and future, and if it weren't, life would slowly parade around us in boring and dismal hues. I've taken a zillion and ten photos of my present home, but really, the ones I've chosen to post today metaphorically offer some of my feelings about HOME best.

The air compressor is sitting in the living room because construction is underway in our new-build home. Life should never be lived expecting things to be finished, perfect, or completed because that's completely unrealistic. (Okay, I give you permission to repeat that to yourself a hundred times until it soaks into your heart, soul, and memory. Go ahead, say it out loud! Most of us need to know that more often than we think we do. I said it several days in a row because I needed it repeated over and over again during our project.) Often there are obstacles in the way that we need to watch out for and skirt around so we aren't tripped up. And the noise!?! This home (earth life) is full of it, along with confusion and disarray at unexpected moments. But like this air compressor suggests, there is always some positive changes we can make to enhance or improve our present life and help us prepare for our desired future outcome. We can live and thrive under less than perfect circumstances. We can endure inconveniences. We can often make changes. If you catch that, you'll understand I'm talking about more than making physical changes. I'm including attitudes, beliefs, moods, emotions and a hundred different kinds of changes that influence our lives now and later.

After we moved into our current home I could have left the closet in the master bedroom alone, but no, the dead space (a whole 43-inches of it above the top shelf) seemed like an impractical waste. We measured the benefits of more storage, then measured the space. It was no small investment purchasing the materials, and no small effort placing them where we wanted them above our heads. Soon the air compressor took up temporary residence in our living room and the project was underway. This home and the next one require measuring our lives--our actions, thoughts, intents, sacrifices, follow through, desires, and more. It takes effort to determine what steps to take and inconveniences we'll need to endure to get what we permanently want in the end.

Getting to the end of our closet project included an unexpected jolt. My car wasn't pulled out of the garage (the wood shop for this project) and dust coated my shiny wash and wax job. Yikes! Look closer and you'll see through the sawdust and find the reflection of sawhorses parked in the next stall. I panicked at first, imagining chunks of wood flying from the saw and dinging the paint. I grabbed my keys and moved the car. Life is like that. There are surprises, shocks, alterations to make, panics to get over, and we have to take action at times when we thought we'd easily sail through something we started. Oh, sometimes there are disasters too, but fortunately making our closet a better place in our home didn't include any.

I love this photo. The back of my husband's shirt says "Customer Care." He really is the nicest guy you'll ever meet and takes good care of me. Wounded knee and all, he climbed the ladder multiple times installing additional shelves. Having the home we desire is work, and sometimes it's painful. When I consider my future home, after this "work assignment" ends, I imagine what I did--what sacrifices I made, how dedicated I was to righteousness in my heart, what I was willing to put up with or improve, and my determination to not quite, and other attitudes and beliefs will be considered. There is no easy way to have good, to capture good, to develop good, or create good, or better, or best. Good, better and best take time and effort, sometimes more than we think we can muster. But it's amazing what we can do when we don't give up, or cave in to discouragement, or throw in the towel, or quit rowing, or doubt the worth of what we want when compared to the demands on our commitement and sacrifices. I painted the finished shelves and began putting our closet back together after my husband dusted off his hands and carried away the last tool, and that was no walk in the park either. I wanted to sit on the carpet and look up and cry--and that is no exaggeration--then grab my magic wand and accomplish the final part with one little flick. Wouldn't we all want a home created that way? Flick, and there it is, sparkling and perfect! But, I didn't sit on the floor or cry, and somehow I missed out on the magic wand gifting occasion, so I couldn't instantly cure the raw wood look or arrange the piles of clutter around my knees. (You know, I've begun thinking no one got one of those amazing wands, except maybe Mrs. Weasley.) Anyway, life isn't a flick of a wand. Having the home we want--now and later--requires a truckload of initiative to combine with our best efforts.

Remember that used pine sofa table I refinished almost exactly one year ago to help me stage my last home for sale? I found the perfect place for it in my new home. Sadly, it didn't weather trailer rides and storage well. There are a few dings in the paint, a couple deep gouges, and several black smudges. You know, there is no such thing as a perfect home in this life, and if a home is momentarily perfect, it's guaranteed that eventually there will be a repair job or total overhaul coming up later. This lucky table is moving up on my To-Do List.

I believe in home. Every aspect of it. In every location.

My home is valuable to me. I treasure it. I know it carries a tremendous amount of power over me and my family, and as a result, I'm careful with how I create it. When I look around my home as I prepare to decorate, rearrange furnishings, add or delete items, update, or do other things, I keep in mind one supreme question: What is the purpose of my home? From there I ask myself descending questions such as: What do I want my home to feel like? What effect will the furnishings have on us? How will the decor enhance or detract from what we want? What will our lifestyle be like, and how will that affect us?  

I know my home could get zapped by lightning and burn down, fall into a crack created by an earthquake and sink to the earths core, or be washed away in a flood. I don't live in tornado country, but a few have been sighted here from time to time, so there is the possibility that one might drop from the sky and grab my home and churn it into matchsticks before tossing it away in the next county. I'd sit down and cry over any of those things--guaranteed. But since this life is more than a physical home, I'd get back up and rebuild.


What is the purpose of your home? How do you view your physical space? What is the unseen atmosphere in your home? What do you do to help your home enhance your life and reach the potential you have for it? How much elbow grease, thought and creativity do you devote to your home and your lifestyle within it? Do you love your home? What vision do you have for your home--not physically, but feeling-wise?